Notes on Choosing the Right F-Stop
A couple weeks ago, I went out with my father to take some pictures of the fall foliage at Ann Morrison Park, one of the big parks southwest of downtown Boise. I got some great shots, a few of which I’ll be sharing in this article, but I made some mistakes in my photography that made my images not quite as good as I hoped they would be. In particular, I found that many of my pictures were not quite as focused and sharp as I’d hoped. Take the photo of the two geese below. The picture looks good at a glance, but it falls apart when zoomed in.
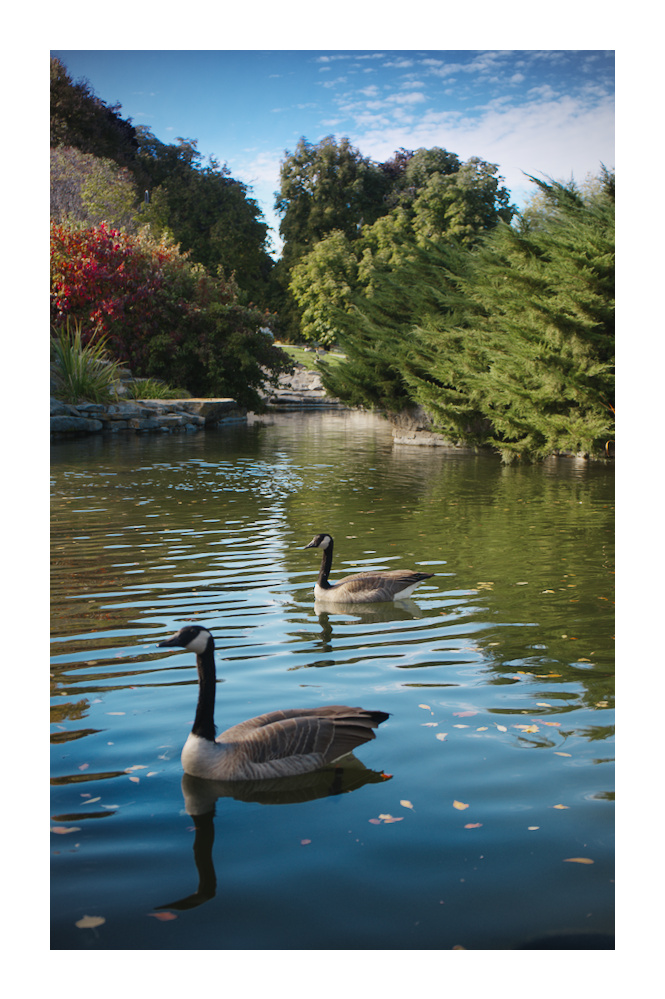
51mm, f/5.6, 1/125sec, focus distance of 6.3m. These settings give a depth of field too shallow to put the whole image into focus. Notice how the closer goose is out of focus.
For example, the goose in the foreground is not in focus. It’s not a deal-breaker, but I wished it had been since it’s such a prominent feature of the picture. Aside from that, the trees in the background aren’t quite as sharp as they could have been, either.
One thing that I could have changed to improve this image was the f-number (commonly called f-stop). In this article, I’ll describe what f-numbers are and why they’re important to understand if you want to take the best pictures you can.
What f-numbers are
Put literally, f-numbers describe a ratio between the lens’s focal length and the diameter of its aperture, the hole in the lens that lets in light. Practically speaking, they control the depth of field (DoF), or how much of the image is in focus. I’ll cover DoF in more detail in the next section.
You’ve probably seen these f-numbers on your camera already. They’re usually written as $f$/N, where N is the f-number. The f-number ratio is described by the equation $N = \frac{f}{D}$, where $f$ is the focal length of the lens and $D$ is the aperture diameter. For example, if you have a 50mm lens and the aperture is set at 25mm, then your f-number is $f$/2. This means that the larger the f-number, the smaller the aperture is. This plays a big role in how sharp the image is.
Depth of field
The DoF of an image describes how much of that image is in focus. Photographers might say an image like a macro or wildlife shot has a shallow DoF because the only thing in focus in the image is subject, whether it’s a flower or an animal. On the other hand, DoF can be wide or deep if everything in the image looks to be in focus, like in landscape photography.
DoF is a property of the physics of how light passes through your lens and hits your camera sensor. See the diagram below for an example.

A diagram showing the effect of aperture on blur and depth of field. Copyright BenFrantzDale - Diaphragm.svg, CC BY-SA 3.0, https://commons.wikimedia.org/w/index.php?curid=11606603
This diagram shows how light passes through the lens (middle) and hits the camera sensor (right). The top lens is a wide open aperture, while the bottom lens has a smaller aperture. The points and circles on the right are circles of confusion, where the light from the subject hits the sensor, either exactly together or a little spread out. The bigger circles mean that those points in the image will be blurry.
Looking at the bottom lens with a restricted aperture (point 4 in the diagram), notice how the lines of light pass more directly through the lens. This narrower cone of light makes the circle of confusion smaller, so the image looks sharper. This also means that the depth of field is wider when the aperture is smaller.
To sum up, a higher f-number makes a smaller aperture, meaning the light goes through more directly and the final image is sharper. For a great video explanation of depth of field, see Dylan Bennett's wonderful video below. He explains not only how the aperture size relates to DoF, but also the two other major factors determining depth of field—distance from the subject and the focal length of the lens. In particular, I love his analogy of toothpaste being squeezed from the focal points as DoF increases.
Let's look at an example. Below are two images I took in the park. Both images have the same focal length of 28mm. They were both taken quite close to their subject, within a yard or so. However, the image of the leaf was taken at an f-stop of $f$/5.6, while the stream was taken at $f$/8. Even at this close distance, you can see how much blurrier the background of the leaf is than the background of the stream.
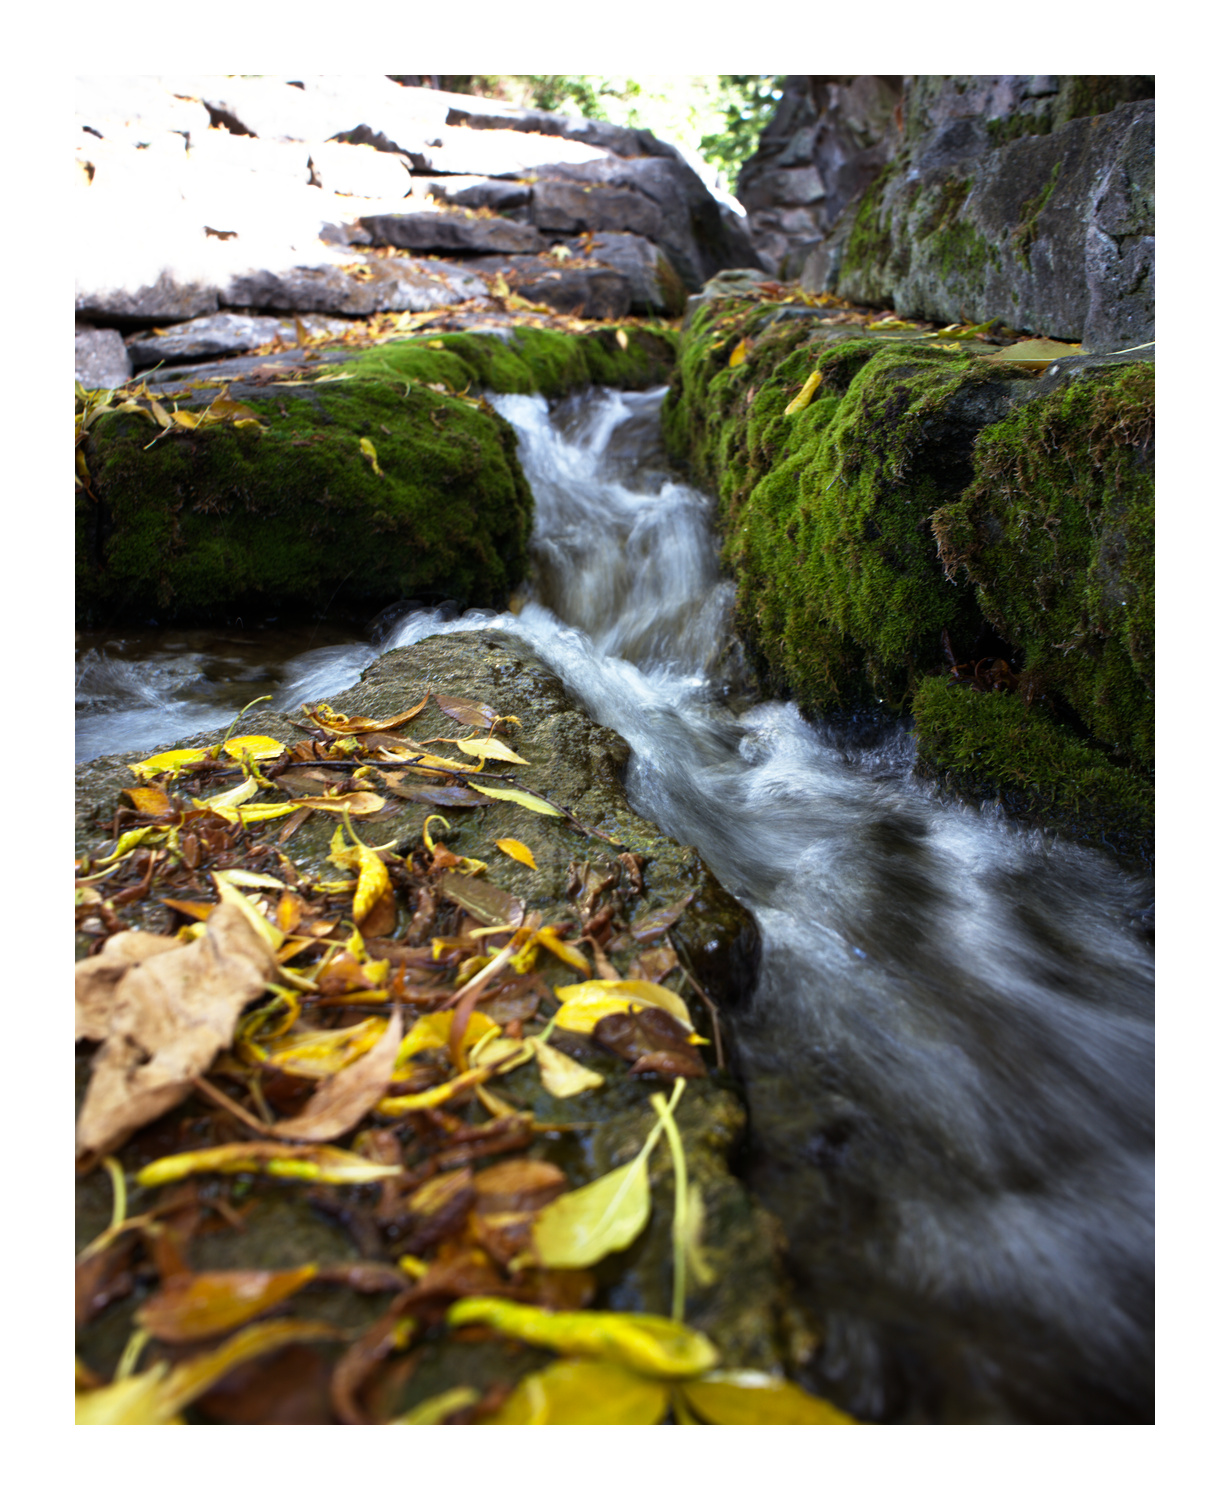

Both photos were taken at 28mm. The leaf photo used f/5.6, while the stream photo used f/8. Even this modest change in aperture increased the depth of field by several feet.
For another explanatory video with more helpful photographic examples, the following video might also be helpful.
Rules of thumb
The f-number and depth of field are proportional to each other, so as the f-number goes up, the depth of field gets wider. This can help you choose a better f-stop for different types of photography. For landscape photography, you usually want as much of your photograph in focus as possible, so choosing a higher f-number will help achieve that effect. Conversely, for portrait or macro photography, you'd want to choose a smaller f-stop so that background and foreground details don't distract from your subject.
Looking again to my photo of the geese in the pond, a larger f-stop would have helped make the photo sharper. The geese were about ten or fifteen feet away, so even a slightly tighter aperture would have made for a sharper image.
For maximum sharpness across your image, you should generally stay away from the extreme ends of your lens's f-stop range. The ideal range for maximum image sharpness is usually around $f$/8, but it's not a hard rule. For example, if you're never going to make large prints of your images, then you can get away with f-numbers that might not give the maximum sharpness. You also have to consider shooting conditions, for example in low light, where a smaller aperture would make your camera slow down the shutter speed too much to get a clear picture (unless you use a tripod).
As you get to know your lenses better, you'll find out how they perform at different f-stops. For example, I've found that the kit lens for my Sony Alpha 7 III isn't very sharp, even in the center of the image when wide open (at minimum f-stop, f/3.5).
As the f-number increases, depth of field increases more behind the subject than in front of it. A common rule of thumb is to focus 1/3 of the way into your scene. This is especially true for landscape photography. Focusing at this relatively close point helps guarantee that the majority of your scene will be in focus with the right f-stop.
Lesson learned: choose the right f-stop
This photography outing was an educational experience for me. It was a lot of fun, but by taking the time to develop my photos afterwards, I also learned that I need to control depth of field better. Writing this article helped me consolidate my knowledge on this fundamental element of photography. The next time I try photographing landscapes with wildlife, I'll start with a larger f-stop, something closer to f/8 or higher. I look forward to trying it out!