Making Deep Blue Skies with Parametric Masks in Darktable
One common problem with developing raw images is that skies often lack saturation or contrast. In this article, I share one particular way to solve that problem with a parametric mask and Darktable’s Color Calibration module. Note that there are probably many ways to solve this problem—this is just one way that I recently learned to do it.
What is a parametric mask?
A parametric mask is a filtering tool that lets you select parts of your image based on a “parameter,” or feature, of the image. For example, you can select all the pixels based on their lightness, color, or saturation.
Some examples of useful things to do with a parametric mask include selecting all of a certain color in an image, for example all the green grass or leaves in an image, or someone’s yellow shirt. You can also select the sky while excluding things around it, which is exactly what I’ll show you how to do next.
Parametric masks differ from drawn masks, where you draw a shape on the image and the module only affects what’s inside the shape. Instead of specifying a region for the module to take effect, the parametric mask specifies what kind of pixel in the image will be affected, whether it’s all the light ones, or the green ones, or the light green ones, and so on. Even though they work in different ways, they can also be used together.
Tools needed for a bluer sky
To increase the contrast of the sky, we’re going to need several tools. First, you’ll need to pick a module. We’ll be using the Color Calibration module in this example, but you can probably also use the Color Equalizer or Color Balance RGB to achieve similar results.
All modules have a built-in parametric mask that you can access at the bottom of the open module. See below for a screenshot. We’ll be using this to limit the module’s effect to the sky in the image.
Process
There are several steps to targeting the sky in your image. First, let’s look at an example starting point. Below is part of an image I took on the Bund in Shanghai in July 2025.
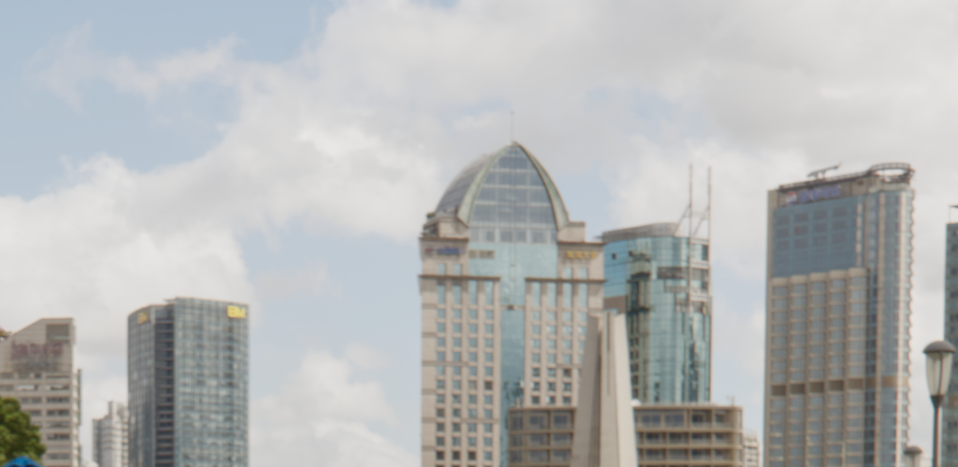
In the raw image, the sky is a faded blue.
The sky doesn’t have any serious technical issues with it. It’s not overexposed, but rather it just lacks saturation. First, find the Color Calibration module, located in the color tab if you’re using the scene-referred workflow in the darkroom. It’s a good idea to duplicate the module because Color Calibration is an important default module that helps set the white balance. If you apply a mask to the default instance, you might affect your image’s white balance. Duplicating the instance helps avoid that problem.
See the screenshot below to see how to create a duplicate. When you’ve got more than one instance of a module, it’s also a good idea to Ctrl+click the module title to give it a label. That way, if you come back to the image a year from now, it will be easier to remember what you did and why.
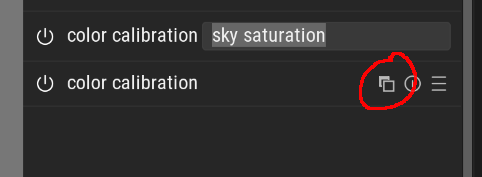
Click the duplicate module button, then Ctrl+click the module title to give it a name. This helps keep your editing process organized.
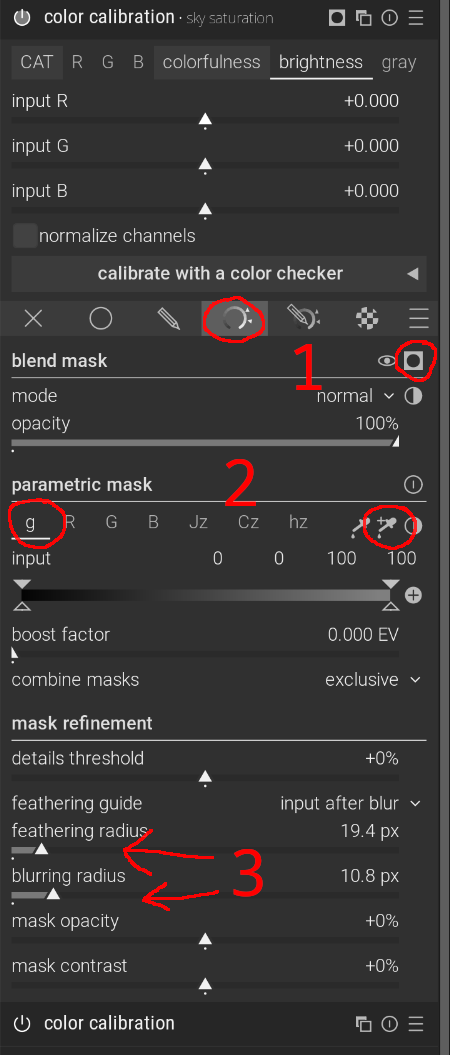
In the new instance of Color Calibration, click the Parametric Mask button at the bottom of the module. Then, turn on the mask view by clicking the button that looks like a dark circle inside a white square. The mask view shows a yellow overlay on a grayscale version of your image. The yellow parts indicate which parts of the image the mask applies to. Since you haven’t adjusted the mask yet, it affects the whole image, so everything will turn yellow.
Go to the “g” tab (for “gray value”), then click the eyedropper with a plus sign beside it. This will let you select part of your image. Click and drag on the sky, and you should see the yellow recede to only the sky.
One possible problem might be that other bright parts of the image could still be part of the mask. There are two ways you can solve this. First, you can try further limiting the mask to only blue colors by following the same process on the “hz” tab in the mask settings. In my case, this was enough to filter out everything but the sky. But if that doesn’t work, you can also click on the Parametric+Drawn mask button (to the right of the Parametric mask button) and draw an oval or rectangle around the sky.
Lastly, to make the mask smoother, you can adjust the feathering and blur radius. This isn’t always necessary, but it can make the effect of the module blend more naturally into the image. The screenshot below illustrates the process.
You can turn the mask view on after setting the mask if you need more precision.
After your mask is set, it should look something like the screenshot below. The yellow is limited to the sky, excluding the buildings around it. Once you’re satisfied with the mask’s selection, you can turn off the mask.

After making a selection with the eyedropper, your mask should look something more like this.
Now, the only thing left to do is to adjust the module itself to make that sky look bluer. First, click on the “colorfulness” tab of the module. Then, increase the “input B.” On the “brightness” tab, reduce “input B.” That’s it! Your sky should have taken on a much deeper shade of blue. Below is a before/after comparison for my example image.

My adjustment is subtle, but you can go as dramatic as you like.
My results are subtle, but you can use the same technique for a much more dramatic effect, depending on your desired results.
This is only one application for parametric masks. You can use them in other creative ways with any module you want. Other example use cases include increasing or decreasing contrast in highlights or shadows, making a single color pop out of a monochrome image, or even completely changing a certain color in the image. I used this technique recently to make stubborn green leaves in an image of fall foliage match the surrounding yellow leaves. The limit is your imagination. Happy editing!