Setting Default Modules and Presets in Darktable
For a long time, I wondered if there was a way to save time in Darktable by turning on modules by default. The process isn’t especially intuitive, but it is highly customizable. In this article, I show you how to do it. Having read this article, you’ll be able to add modules to the default set and apply presets automatically. Save yourself a few clicks on the hamster wheel of repetitive-stress injury and make the editing process faster and more fun.
First, open an unedited image in the darkroom view. Then, turn on a module that you want to have on by default. I always turn on Lens Correction and Denoise (Profiled). If you want a module to use a certain preset or custom settings by default, choose the preset from the module’s menu or make your own adjustments, as well. I apply the “smooth” preset to the Sigmoid module because it helps prevent color shifts.

Choose the preset you want to use by default. Optionally, tweak the preset or use your own custom settings, instead. Then, click “store new preset…”
At this point, you have turned on a module that you want to be applied by default and have optionally selected a preset, too. To apply it to all new images, select “store new preset…” Give the preset a name (for this case, I usually use “default”). To make sure it’s applied to all new images, check the box “Auto apply this preset to all matching images.”
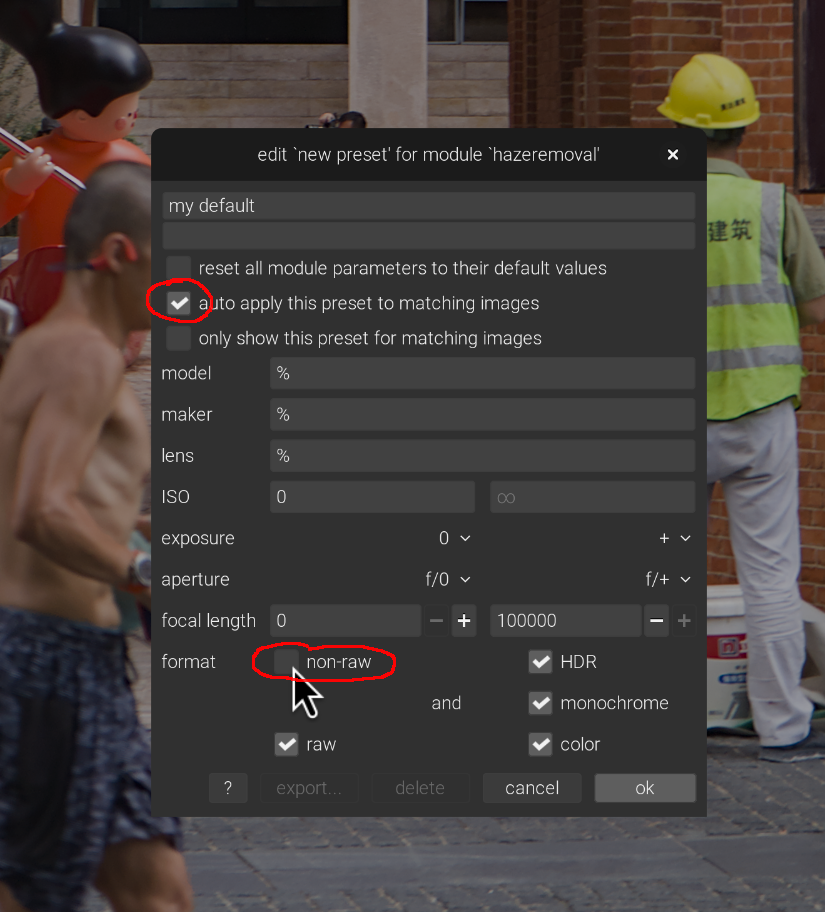
Check the boxes to apply the preset to all newly imported images. You can apply different presets to different images by adjusting the options here. Leave them untouched to apply to all images.
If you have both raw and non-raw images in your library, you can uncheck “non-raw” so that the preset will only be applied to raw images. After you click OK, the preset will be applied to all newly imported images. They won’t be applied to images already in your library. If you want to apply them, the easiest way is to reset the image edit history by clicking the reset button on the History module in the left panel. Do note that this will delete any edits you’ve already made to the image. If you want to keep your current edits, you can always create a duplicate from the duplicate manager by clicking “original” in that module.
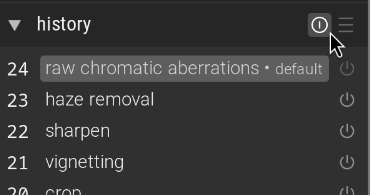
Click the reset button in the History module to reset the history. The side effect of this is that your new default preset will also be applied.
That’s it! Now, new images imported into your library will have these modules turned on by default, with your preset or custom settings of choice already applied. This saves you from having to find modules in different tabs just to turn them on—instead, you can skip that busywork and jump right into making your edits.